Sync Deals to CRM
Basic Deal to CRM flow
Working with reseller partners means establishing clear and transparent deal registration processes to ensure your resellers can confidently sell your product. PartnerStack Deals make it easy to set up a simple, transparent and reliable system for deal registration.
In this article, you’ll learn the basics of the PartnerStack Deal configuration and integration setup.
Things to know
Here are some key things you should know about Partnerstack Deals:
- PartnerStack Deals are only available on certain plans.
- Deal configuration is accessible to Admins, and teammates with "full" group permissions for the group being configured.
Configure Deal forms
The data you collect from partners is critical to successfully creating a Deal in your CRM.
Accessing Deal form configuration
- Login to PartnerStack, and navigate to the groups list.
- Click a group to access the group configuration details
- Click "Deal Submission"
Configure Deal form
-
Provide an optional title and description.
Use the description to provide partners with additional information that will help submit the form successfully. -
Add/Remove/Edit fields
The forms support a variety of options and input types outlined below.
Ensure to include 'required' on fields that are required in your CRM.
- Input - a small text field
- Textarea - a larger text field
- Dropdown - Single selection list of options
- Checkbox- Multiselect list of options
- Country -Dropdown list of all countries to be selected from
- Region - Paired with Country field, displays states/provinces in the selected country.
- Number - Phone number field validates input to ### ### ####
- Email - Email field validated input to email format
- File Attachment - Accepts one or multiple file attachments
Configure CRM
In your CRM, create the following string-type fields that will serve as reference keys between PartnerStack and your CRM
- partnerstack_partner_key
- partnerstack_deal_key
Authenticate with CRM
Authenticate your CRM connector or HTTP connectors in the integration suite. The details of your authentication method is determined by the CRM you are using.
- Navigate to your integrations suite (permissions required)
- Click "Connected Apps" and "Create connection"
- Search for your CRM in the list of Connectors, click the logo and follow the connection guide.
CRM not listed? Search for and select the "HTTP" connector and use your CRMs public API documentation to authenticate with their required authentication type
Configure integration
The integration suite allows the creation of highly configurable connections with your deal and CRM data. Keeping deals records in sync requires a minimum of 3 recipes, but more may be required depending on your use case.
Below we'll cover the basic principles you can apply to your CRM.
Recipe 1: Push PartnerStack Deal to CRM
Trigger Steps
- Navigate to the recipes list and click on one of your blank recipes.
No blank recipe? ask your account manager to create a new recipe for you. - Select "Trigger event", and search for the "PartnerStack" connector that is pre-authenticated with your account.
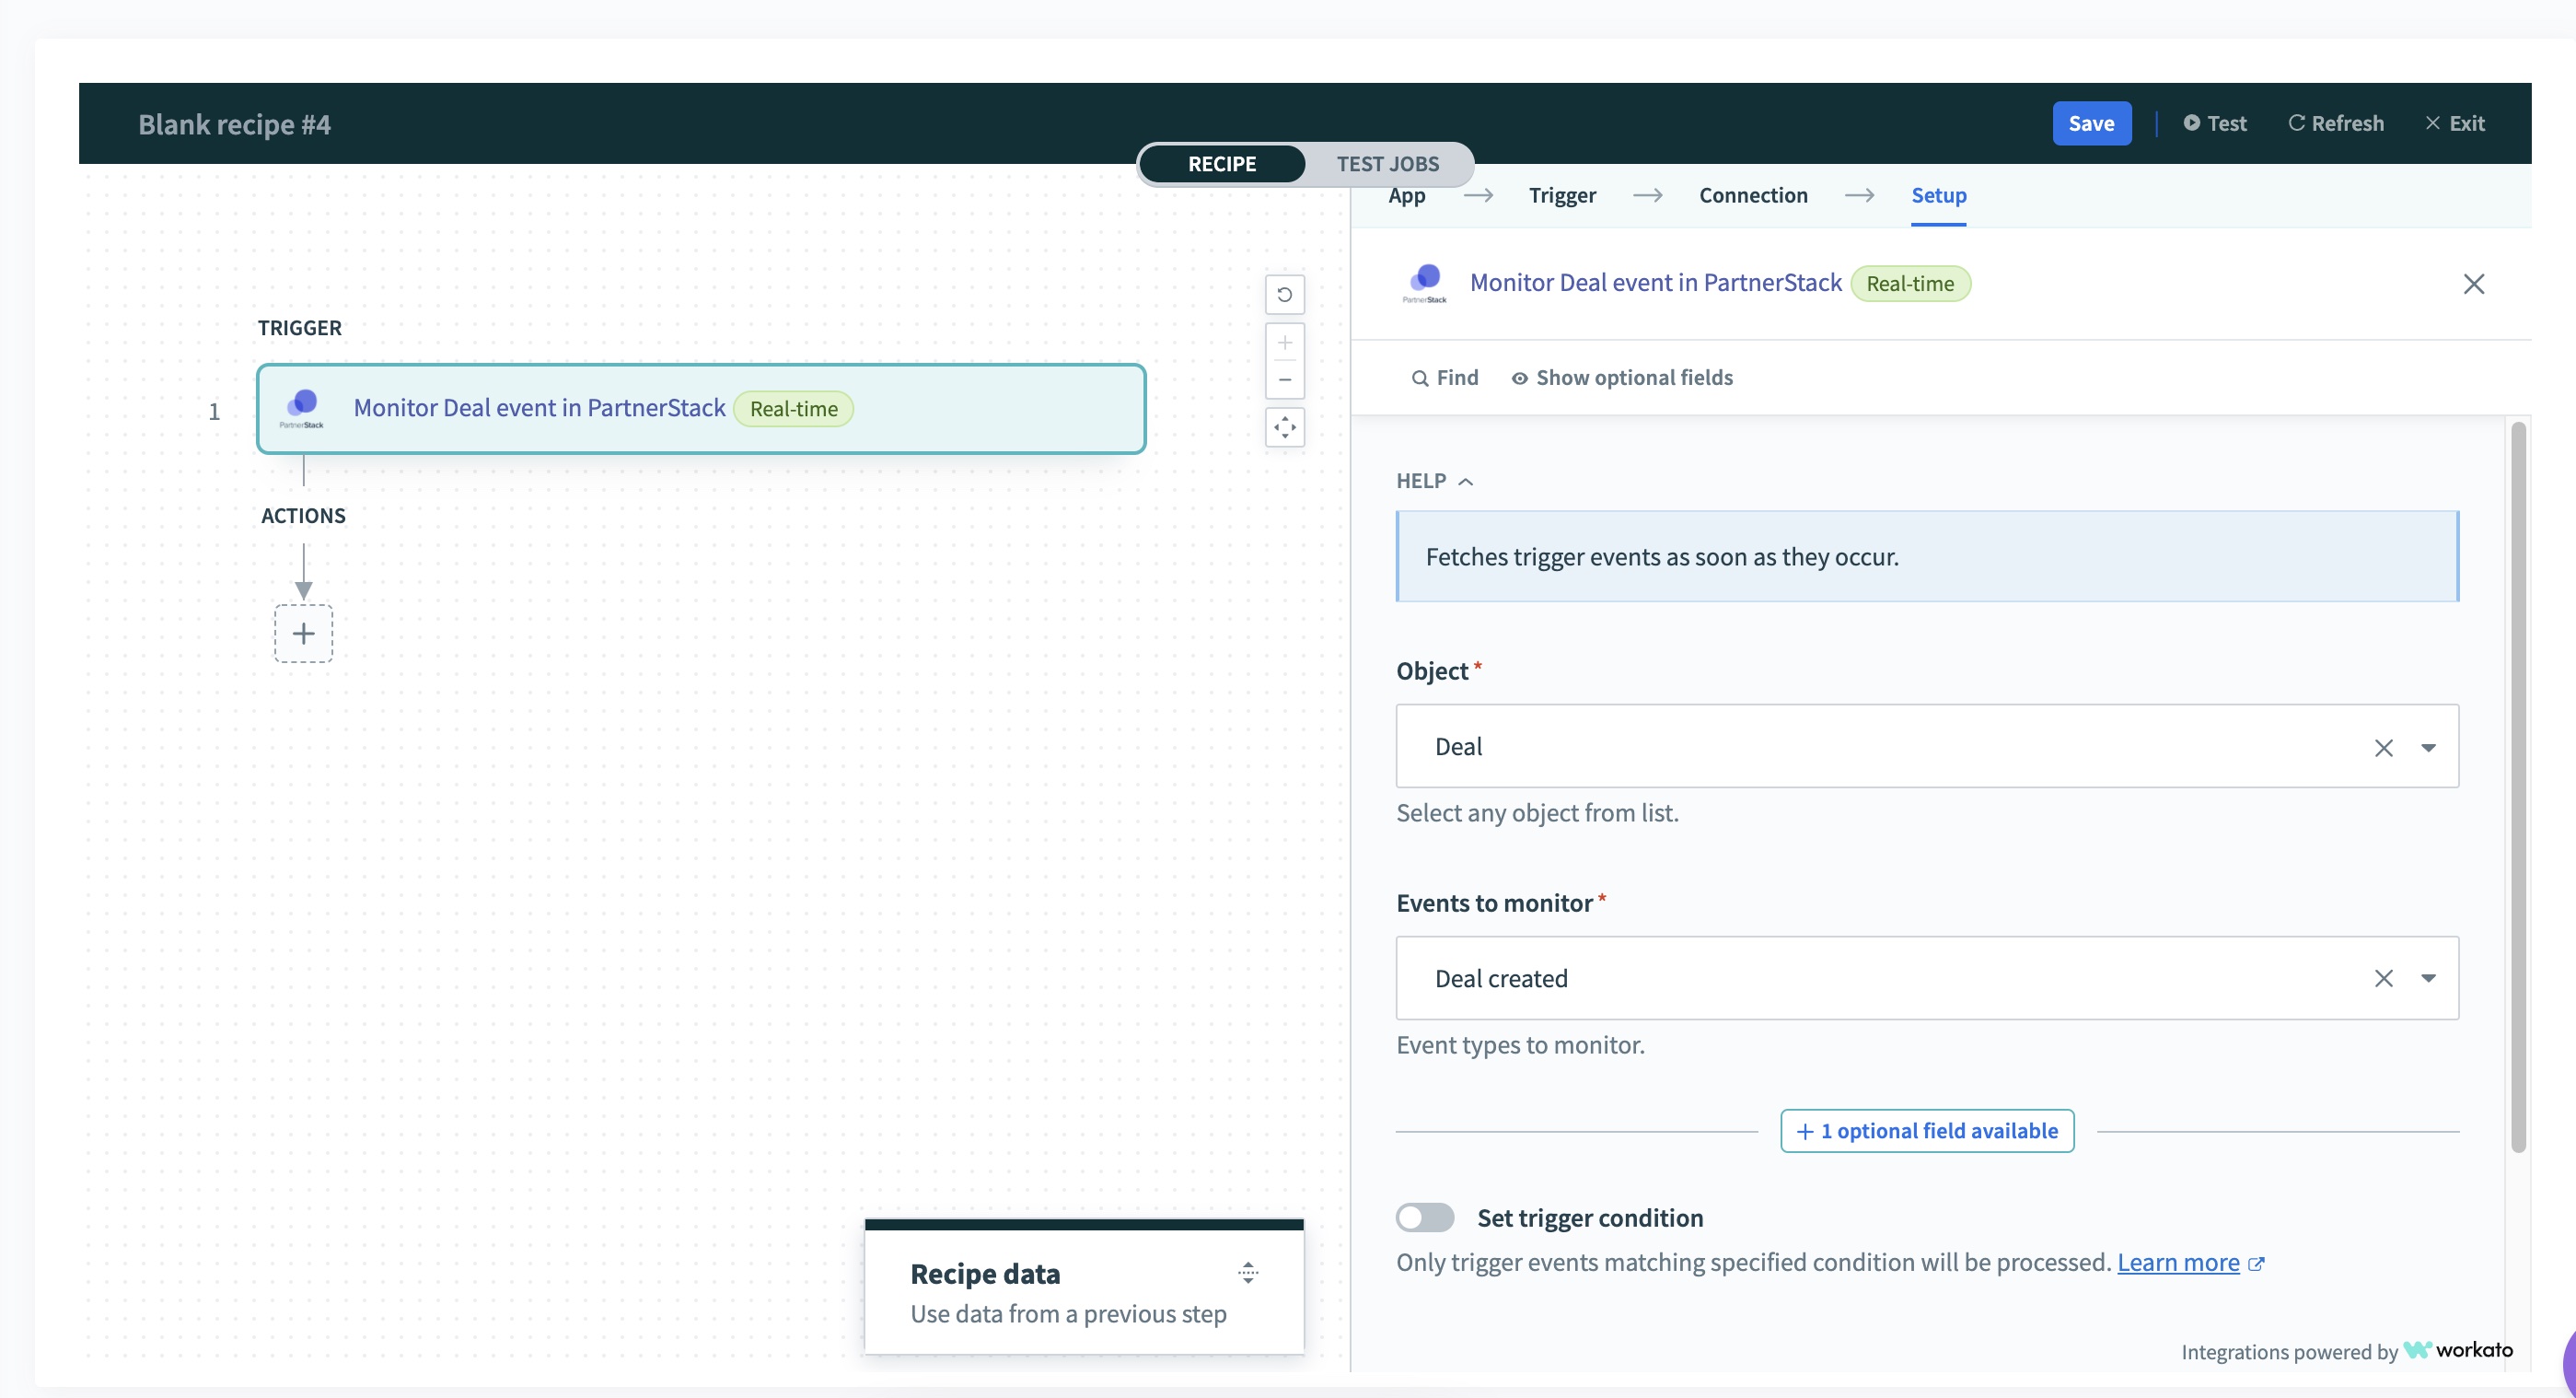
- Select "New Event" trigger, and complete the trigger setup:
Object: Deal
Events to Monitor: Deal created
Action Steps
4. Click the plus (+) icon, and add an "Action in app"
5. Select your CRM (or HTTP if your CRM is not listed)
6. Select the action to create a new record in your CRM.
This step is unique to your CRM andyour integration plan. The following example uses Hubspot for illustration
7. Click on each field properties, and map the corresponding value from the PartnerStack Deal creation step.
Be sure to map deal.partner_key field to partnerstack_partner_key and deal.key to partnerstack_deal_key you created back in "step 2 - configure your CRM"
8. Save the recipe (blue button)
9. Test the data flow

Recipe 2: Update PartnerStack deal with CRM data
In this case, the data flow is reversed. The first step is initiated by a change in your CRM, and proceeded by mirroring the change on the PartnerStack object.
Trigger Steps
- Navigate to the recipes list and click on one of your blank recipes.
No blank recipe? ask your account manager to create a new recipe for you. - Select your CRM (or HTTP if your CRM is not listed)
- Select the action that corresponds to an 'updated record' in your CRM
This step is unique to your CRM andyour integration plan. The following example uses Hubspot for illustration - Select "Set trigger condition" configure the following options:
Trigger Data: "partnerstack_deal_key"
Condition: Boolean True
At this point, PartnerStack is listening for changes to your Deal objects, but only proceeding if the Deal was driven by a partner.

Action Steps
5. Click the plus (+) icon, and add an "Action in app"
6. Select "PartnerStack" connector.
The connector comes pre-authenticated with your account.
7. Select "Update record" action, and complete the action setup:
Object: Deal
key: partnerstack_deal_key
8. Click on each field properties, and map the corresponding value from your CRM to the PartnerStack Deal.
9. Save the recipe (blue button)
10. Test the data flow

Conclusion
This article outlines the basics of Deal synchronization between PartnerStack and your CRM. If you're looking for a more in-depth guide, please look to our Guides sections where we cover specific use cases in greater detail.